Note:
All tutorials will be using Windows Digital AVI video at 720x480
resolution and 29.97 fps. All measurements are relative to that
scale.
[
Place Solids ]
Select:
LAYER -> New Solid... (Ctrl + Y)
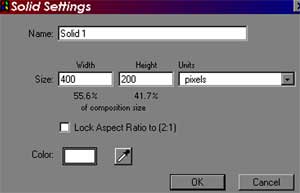
This will
be the white layer of lightsaber. The measurements should be
at least 400 pixels wide x 200 pixels high. If you need to make
the saber longer, then change the width from 400 to 600 or so.
Edit
the Solid
Double click
Solid 1 in the COMPOSITION window. This will bring up the SOLID
editing window.
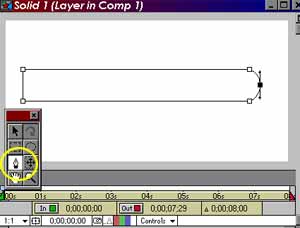
Use the
Pen tool to make custom mask on Solid 1. First, make a four-point
rectangle like above. Second, make a fifth point between one
of the short ends. Click the point again with the Pen tool to
make it a curve. This will be the tip of your saber. (Depending
on the perspective of the saber in the shot, you may want to
repeat this process on the hilt side of the saber.
Place
Solid in COMPOSITION
In the COMP
1 window, use the arrow tool to move the Solid into position.
Setting
Up the Timeline
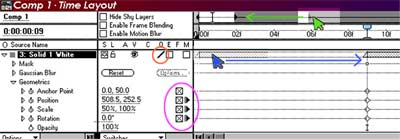
1) Green
- Slide the triangle down all the way to the left. This shrinks
the timeline to a frame by frame mode.
2) Orange
- Click on the quality button until it reaches "Best"
quality. You will notice this when the Solid becomes anti-aliased.
3)
Blue
- Get the Timing Down
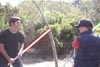
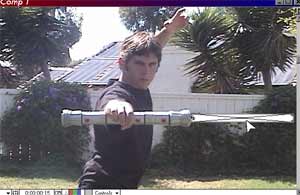
Go through
the composition frame by frame and try to pin-point the moment
when the lightsaber should ignite. In this example it is when
his right index finger opens out then touches the button on
the lightsaber. This occurs on Frame 9, so I want the Solid
to enter the composition on Frame 9. To do this, just drag the
Solid so that the end with the triangle lines up with Frame
9 in the COMP 1 TIMELINE.
3)
Purple - Click
on these boxes to create a key-frame for the shape (Geometrics)
of the Solid. It is important that you create these key-frames
on the first frame that the Solid appears, that way you can
animate it later on.
Note:
Up to now, the process is the same for creating lightsaber ignition
and a lightsaber that has already been ignited.